Restore system from backup
Automatic backups
- To be able to restore the system from a backup, it is necessary to enable the backup feature in the system settings (Settings / Syst. settings / Backups).
- If the backup feature is enabled, a backup of the entire system is automatically created every day at a specified time and saved to the /data/backup/ folder on the server.
- We recommend that you also enable FTP backups (checkbox Upload backups to FTP server) so that you can restore the system data even when your disk has failed.
Manual backup and restore
- The system backup and restore process can be initiated using the command
ispadmin_backup. - To display Help, add
-h / --helpto the command above:ispadmin_backup -h. - To create a full backup, enter
ispadmin_backup -b.
Restore data to relevant folders after server reinstall
- Copy the backup you want to use to the /data/backup/ folder on the server.
- Restore data step by step.
Preparation
- Stop the cron service on the server:
systemctl stop cron - Set the same password for the ispadmin database user as the one used before data restoration: In the process, the configuration file containing the database password will be overwritten by the corresponding file from the backup. The backup script would not be able to log in to the database. You can change the password using the command
/usr/local/script/ispadmin/bin/ispadmin_change_pass.pl <type> <root password> <new password>- <type> Database user ispadmin or mysql_root
- <root password> mysql_root user password. The default one (after installation) is ispadmin.
- <new password> New user password
- Example:
/usr/local/script/ispadmin/bin/ispadmin_change_pass.pl ispadmin ispadmin originalPassword - Individual parts can be restored using the command
ispadmin_backup -r -f <section> -a <backup path> --to <destination folder> - Let us assume that the backup can be found in the
/data/backup/20200401-0230folder on the server.
Restore ispadmin folder
- Restore the ispadmin folder using the command
ispadmin_backup -r -f isapdmin -a /data/backup/20200401-0230 --to / - You will be asked to provide the password:
Compress Password : - Enter the archive password and confirm it.
- Once the folder is restored, set the appropriate rights: chown www-data /data/support/ispadmin/* -R
Restore script folder
- Restore the script folder using the command
ispadmin_backup -r -f script -a /data/backup/20200401-0230 --to / - You will be asked to provide the password:
Compress Password : - Enter the archive password and confirm it.
- Once the folder is restored, set the appropriate rights:
chown www-data /usr/local/script/ispadmin/rrd_data/* -R
Restore MySQL database
- Restore the MySQL database using the command
ispadmin_backup -r -f db -a /data/backup/20200401-0230 - You will be asked to provide the password:
Compress Password : - Enter the archive password and confirm it.
- Then, you will be asked to provide the relevant database name (default: ispadmin):
Would you restore Db to default dbname [ispadmin]? [Y/N]: - Enter Y and confirm your choice.
Restore Influx database
- Before restoring the Influx database, you have to delete the original one.
- Log in to Influx by entering the command
influx. - The following text appears on the screen:
Connected to http://localhost:8086 version 1.7.6
InfluxDB shell version: 1.7.6
Enter an InfluxQL query
>
- Enter the command
drop database ispadmin;and confirm it. - You can exit Influx by entering the command
exit. - Restore the Influx database using the command
ispadmin_backup -r -f influx -a /data/backup/20200401-0230 - Once the Influx database is restored, it is necessary to configure Influx to correctly calculate data for weekly, monthly and yearly graphs.
- It is necessary to run the command to create all retention policies and continous queries for influx, without which the graphs of transferred data are not visible:
/usr/local/script/ispadmin/bin/initInfluxPolicy.pl -r -c(parameters: -r = retention policy, -c = continuous queueries)
Final steps
- Unpack the etc folder backup to the auxiliary /restore folder:
ispadmin_backup -r -f etc -a /data/backup/20200401-0230 --to /restore - Do not unpack the etc backup to the folder used by the system! The 7z archiver that is used for creating backups does not save the owner and group settings. If you restore the data to the folder used by the system, the rights set for this folder will be overwritten and some system services will stop working.
Nagios
- Modify the Nagios configuration for ISPadmin:
nano /data/support/ispadmin/new/app/config/nagios.neon - Replace the value of the nagiosSecret parameter with the word nagios.
parameters:
        nagiosSecret: "8189376221001542654749"
parameters:
        nagiosSecret: "nagios"
MySQL
- Copy the database configuration of the MySQL service:
cp /restore/etc/mysql/mysql.cnf /etc/mysql/mysql.cnf - Restart MySQL:
systemctl restart mysql
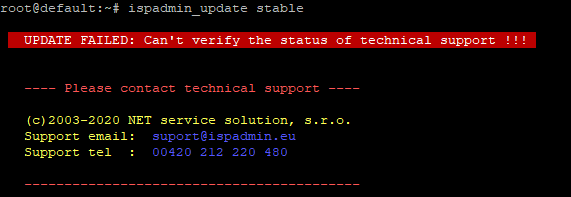
ISPadmin upgrade
- Upgrade ISPadmin:
ispadmin_update stable(or beta). - If the following error message appears, reregister your license according to the instructions here and initiate the upgrade process again.
Apache2
- Generate the HTTPS certificates according to the instructions here.
FreeRADIUS
- Copy the database configuration of the FreeRADIUS service :
cp /restore/etc/freeradius/3.0/mods-enabled/sql /etc/freeradius/3.0/mods-enabled/sql - Restart FreeRADIUS:
systemctl restart freeradius
Nagios
- Regenerate the Nagios configuration:
/usr/local/script/ispadmin/bin/nagios_cfg.pl