Installation and migration to ISPadmin 5
If you want to migrate your system to ISPadmin 5, there are several possible courses of action:
- Migration within a single machine
- Migration from an old server to a new one
- Migration within a single machine (virtualization)
- Migration from one server to another (virtualization)
- Migration from your server to our cloud solution
- Migration from our cloud solution to you own server
In all the above-mentioned cases, migration is carried out exclusively by our experienced technician. That will help keep any complications to a minimum. Migration from version 4 to version 5 is free of charge. Any further migrations or extra services are subject to a charge (according to the current price list).
Before migration, it is necessary to check whether the server meets the minimum requirements. The requirements mainly depend on the number of clients that are to be managed by the system. The following table gives you a few relevant ballpark figures:
| Number of clients | CPU | RAM | HDD – System | HDD – Data |
| Up to 500 | 4 cores | 8GB | 80GB |
|
| 501 – 2000 | 8 cores | 16GB | 100GB |
|
| 2001 – 4000 | 12 cores | 32GB | 80GB | 80GB |
| 4001 and more | Determined on a case-by-case basis | Determined on a case-by-case basis | Determined on a case-by-case basis | Determined on a case-by-case basis |
If we find out that the server does not meet the minimum requirements, we will immediately inform you of the fact and suggest a possible solution (component upgrades, new server purchase, etc.).
Installation preparation
- This procedure doesn’t apply to migrating from your server to our cloud solution
- If migration is to be carried out within a single machine, it is first necessary to connect a disk (e.g. external drive) to the server so that a backup of the entire system can be made. As soon as you connect the disk to the machine, let us know. Our technician will make the backup. When it is finished, you will be contacted by our technician.
- You download the ISO file from the link provided by us (HERE).
- You create a bootable medium (USB flash drive, DVD) with tool Rufus or UNetbootin.
- Boot the server from the bootable medium (DVD, USB flash drive) – setup in BIOS, set the correct boot sequence. The bootable medium created has to be the first in the sequence.
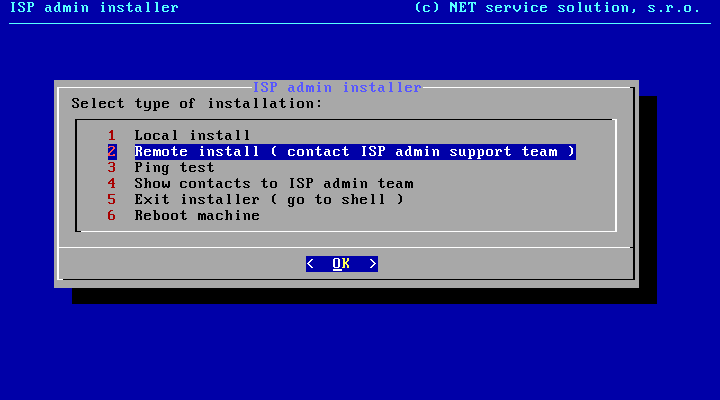
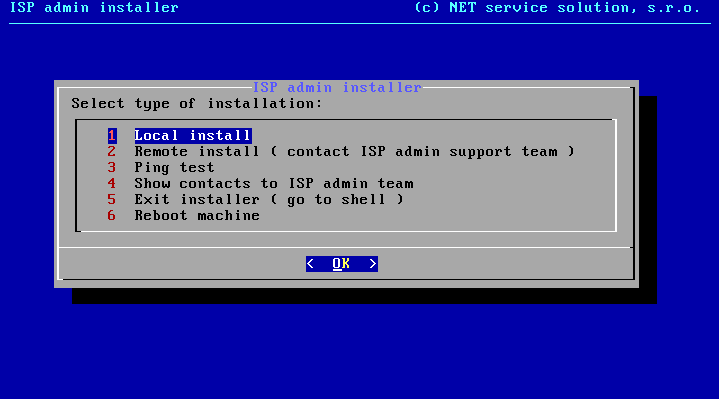
- Choose the Remote install option from the menu that appears on the screen and fill in all the required data.
- Let us know that everything is ready for the upcoming migration.
- Our technician will carry out the ISPadmin 5 installation and then migrate the data to the system (if necessary).
- Enter the IP address. It has to be a public address so that we can connect to the server from the Internet.
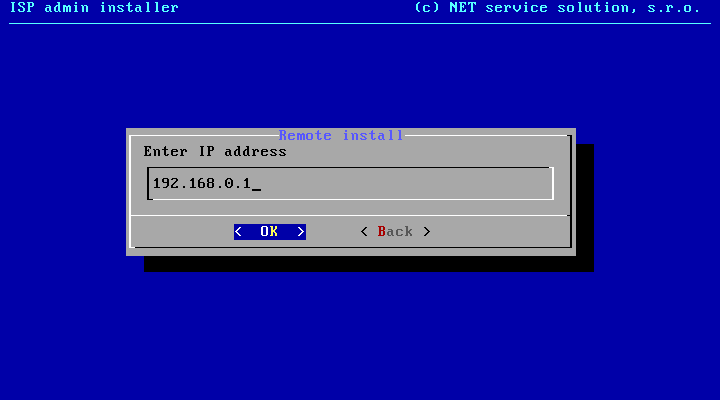
- Then, enter the mask.

- And finally, the network gateway.

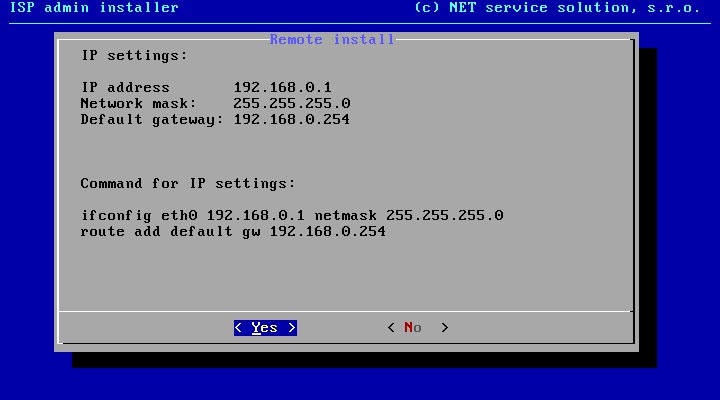
- As soon as all the required items are entered, an overview of the entered IP addresses appears on the screen. Click on the Yes button to activate them. All the preparatory steps have now been taken.
- To complete the preparatory of installation, this window must be confirmed with the OK button.
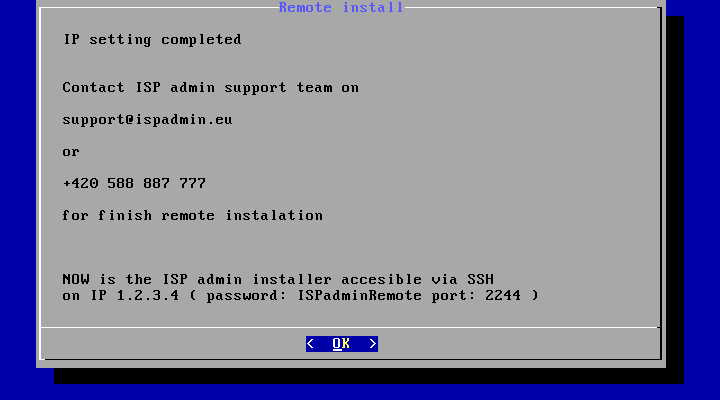
- Contact our Technical Support and tell them that everything is ready for the upcoming migration.
- Our technic will made installation of ISPadmin system and migrate data.